Hügelkultur is a German word meaning more properly ‘mound cultivation’, rather than the ‘mound culture’ term frequently bandied about in channels of information, such as Youtube. It is an organic horticultural method. Hans Beba and Hermann Andrä first used the term in a booklet published in 1962 (with several revised editions published in the Seventies and thereafter) entitled Hügelkultur : die Gartenbau-Methode der Zukunft (Hügelkultur: the Gardening Method of the Future).
Mound cultivation has a lot in common with raised bed gardening – as opposed to flat bed gardening. Both Hügelkultur and raised bed gardening place emphasis on optimising the condition of the soil, which has direct benefits for the plants grown in it. It is the ideal way to start a no-dig garden, popularised most thoroughly by Charles Dowding, in my humble, intuitive opinion, and also adopted widely by permaculture enthusiasts.
I did not know I was a permaculture enthusiast until I started reading up about it after the fact, and this amuses me greatly, since my chief method of gardening has been to watch and listen to nature, and go from there. I am trying to be more methodical about it now, and adapting some really useful tips to my own way of doing things. Although I have grown vegetables for years, in many respects, this is Year 1.
A basic Hügelkultur construction involves laying natural organic waste, starting with a bottom layer of logs and wood, followed by leaves and other dry matter, composted soil, and then topped with mulch. Where was I going to get all that stuff, you might well ask. It turns out (since I do not live in a concrete jungle) I did not have to look very far.
This post will show step-by-step how I constructed my first Hügelkultur with what I had immediately available to me.
I started with the heap of cut weeds and grass that had been covered for the last six weeks, and added to occasionally since. I moved the heap to one side, separating the more composted matter from the dryer matter. This left me with a bare patch of earth, which I dug down about eight inches (20 cm) before my hoe refused to penetrate the hard clay beneath. My bed area was now four feet (1.2m) by eight feet (2.4m).

A word on measurements: I was educated primarily on a colonial British system. Decimalisation was only taught in school from 1972, the year I turned eight, around which time my sister and I planted our first seed tray of nasturtiums. We sat for ages one afternoon, finely sieving soil from my father’s compost heap of lawn cuttings, which smelled divine. Added to which, I grew up playing golf, where the length of one’s drive was described in metres, while the length of one’s putt in feet or inches. Hence the mishmash in my mind, and in my narrative.
Now that I had a hole, I filled it with all the firewood I had on the property. I do not have a fireplace, and have never barbecued at home, but there is something satisfying about having a woodpile in the garden, anyway.


I know that olive branches take ages to decompose, but since they would be more useful in the Hügelkultur than in my compost heap, I added them as a separate layer.

The next layer was all the dry grass from the original ad hoc compost heap I had made on this site. If I had a pile of leaves, I would have added them now.

Now it was time to barrow in composted soil.

The work up until this point had taken me 55 minutes in the early morning. Admittedly, something on social media had annoyed me greatly, so it was a conscious exercise in anger management on my part, and could account for the speed at which I worked. It is always so much more therapeutic when occupational therapy produces a useful outcome apart from a calm frame of mind!
I covered the mound, and returned the following afternoon, and continued piling on composted soil, and raking it level.

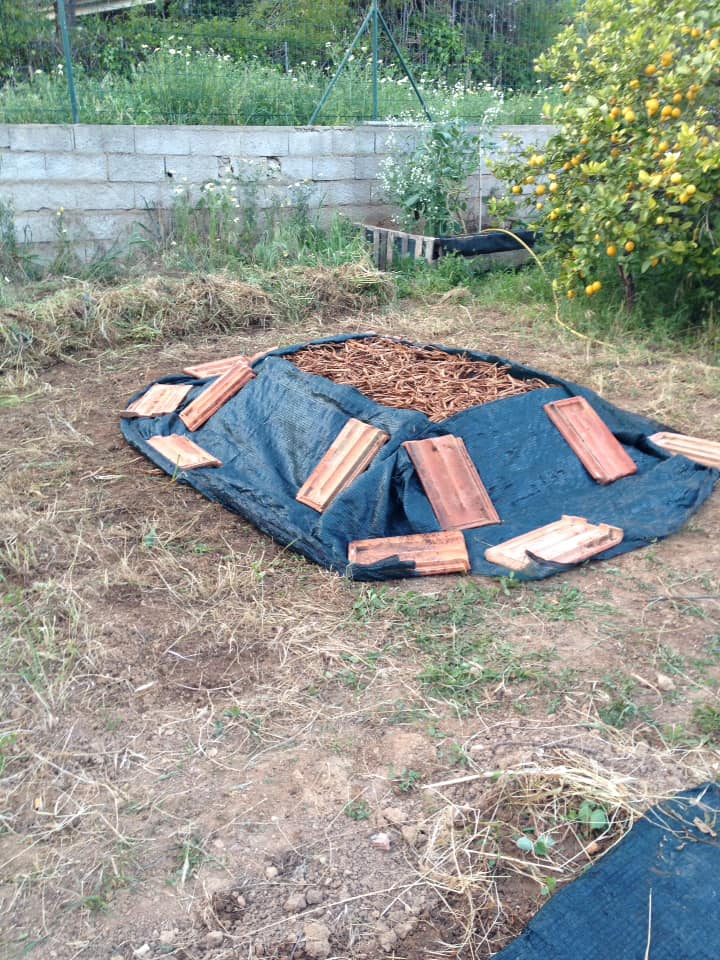
Strictly speaking, Hügelkultur does not demand that one rakes anything level, especially if you intend to leave the bed to settle for a season or two. I needed to plant into it immediately, and am a lover of straight lines. Before I added the last two loads of composted soil, I stomped around joyously on top of the mound, to minimise any air pockets and general unevenness. This counts as mindfulness, in my book. As you can see from the above image, I have cut away the surrounding long grass and weeds. and piled it up as my next source of green compost. I think you can spot the difference in soil quality between what is on the mound, and what surrounds it. The poor quality of the surrounding soil easily explains why raised-bed Hügelkultur is the smart option here.

Next, I took some ordinary “builder’s shadecloth”. At EUR 0,78/square metre, it is cheap. Doubled over, it has the same effect of not letting in any light that black polyweave, which is more than twice the price, has. Laid out as it is in the image above, it both suppresses weed growth and retains moisture in the material beneath, which contributes to more rapid composting, and saves on water usage. The worms and wood lice also like it. So do the centipedes, but I do not like them. It also has the advantage of maintaining the integrity of the structure I have created. This will make it easy to convert to a raised bed out of pallets at some later stage.
It is hard to believe, but this particular site has been cleared of weeds each spring, and the soil scraped bare with my mega-rake for five years in succession. The Algarve is certainly a fertile place. With a bit of luck, I shall procure at least a tonne of hay at some time during the summer, and a thick layer of hay will replace the green shadecloth. The shadecloth can then be used as an overhead shield from the harsh sun, and therefore continue to promote the growth of the vegetables beneath.

My mulch, in this case, was wicker from an old chair (another rubbish bin find, currently being restored), which I had rinsed well and pre-soaked in water. I have planted spaghetti squash on the sides, and a row of carrots down the centre. Since I intend to construct a frame for the spaghetti squash to vine, if the carrots grow, then they will be suitably shaded. Growing carrots here is a two-fold experiment: I know exactly what lies beneath the surface, and it is not the substrate recommended for carrots; I am also not going to thin these carrots, which goes against the grain of the advice given by many. The top surface area now measures roughly 3 x 6 ft (1 x 2m).
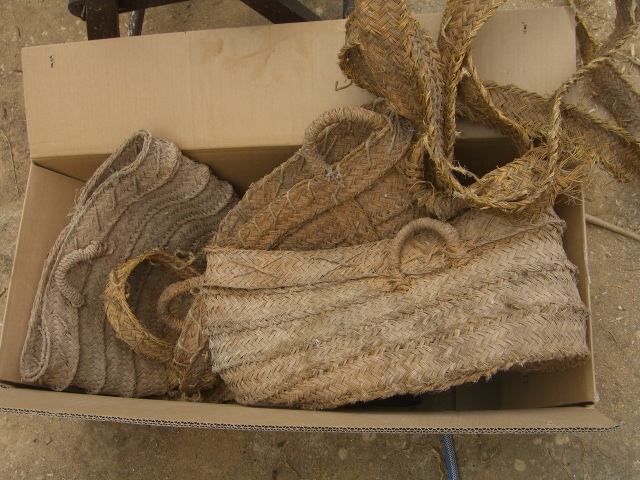
I am currently producing more mulch to put here by unravelling these old baskets (made from empreita, or woven palm leaves), also discarded by some stranger, who does not like dusty old baskets with holes in the bottom, rendering them useless.
You can see the result of my unravelling in another raised bed of mine, home to pumpkin seedlings:

Several days later, the spaghetti squash are doing well, except for the two which have been eaten by some mysterious creature. Just as well this vegetable is prolific – and certainly worth the effort taken to give them a place to flourish.
©2019 Allison Wright

This is interesting Allison, my neighbour happens to be a horticulturist and she made a Hügelkultur bed and grew potatoes. The crop was prolific! – for a couple of years. I’ll see if I can copy this link to her.
LikeLike
The more friable the soil, the greater the yield – especially when one is not using inorganic fertilisers. I had two potato plants push up, each one in a separate bed; one month later, the one in the raised bed pictured in the background above is flourishing, while the other one, in a raised bed I did not make, where the soil still needs a lot of work, is still tiny, and might not produce anything. Two weeks ago, I started a no-dig potato experiment at the other plot, next to an existing potato bed (which is not very impressive). I suppose I should take a couple of photos and start documenting progress. The big Hügelkultur at the other plot is destined for sweet potatoes, and a lot of my creative energy is going into that!
LikeLike
I love Hugelkultur too. My only real issue with my extensive beds is that they provide a home for the resident black snake and she sometimes gives me a bit of a shock when appearing out of a concealed hole.
LikeLike
In Portugal, there are only eight different kinds of snakes, of which two are poisonous, so this is unlikely ever to be a problem for me. I guess that you might really get a shock if you start seeing more than one black snake. The most dangerous creature here is the centipede, of which there are many. Another reason to wear boots! I loved your article on the start of your biogas adventure, by the way.
LikeLike